From corrupted files to lost folders, it’s no secret that digitally storing and sharing information can be an absolute nightmare. Luckily, there is a simple solution: setting up your very own FTP server! In this article we’ll give you the lowdown on how Windows 10 users with nothing more than their computer and internet connection can easily create their secure online storage folder paradise. Let’s get started!
What is an FTP Server and What Does it Do?
For businesses looking for a secure and reliable way to store, share and recover files quickly, look no further than the File Transfer Protocol (FTP) server. FTP provides private cloud storage without imposing any restrictions like other services might – perfect for those needing more control over their data! With it’s superior security features there is no need to worry about your sensitive information falling into the wrong hands either.
Creating Your Own FTP Server on Windows 10
Don’t let the technical jargon of FTP servers scare you away! With Windows 10, creating your own is a breeze. In just a few steps, you’ll be able to host and store all your documents on an easy-to-use server that’s ready for business.
- Press the Windows key on your keyboard, type “Control Panel” in the search field, and click that option.
- Click on Programs and then Programs and Features.

- On the left-hand side of the window, find and select ‘Turn Windows Features On or Off‘. This will open a new, smaller window.
- Locate and expand Internet Information Services by clicking the small plus sign next to it, then do the same with FTP Server.
- Click the checkbox beside FTP Extensibility then do the same with Web Management Tools just below.
- Click on the OK button and allow Windows to install the feature. Once this is complete, click the close button.

How to Configure Your FTP Server
Setting up your FTP server can be a breeze – with just a few simple steps! First, install the necessary features and then configure it for optimal use. Finally, you’ll have access to a world of digital data transfer possibilities!
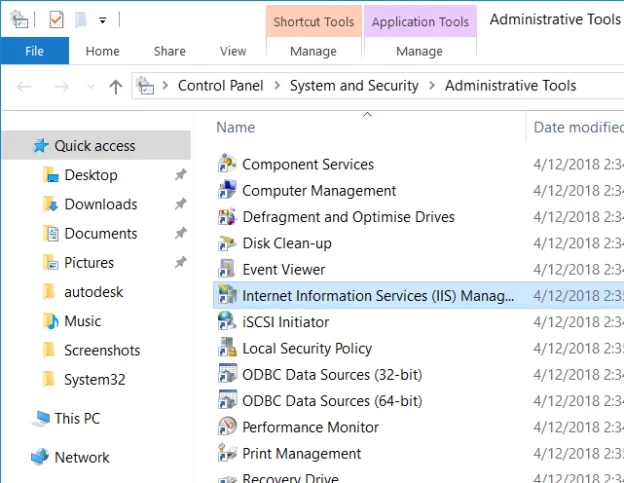
- Open your Control Panel again, then locate and select System and Security.
- Click on “Administrative Tools” which should open in a new window.
- Locate Internet Information Services (IIS) Manager and double-click this option. If this option does not appear, you will need to download it from Microsoft, which can be found here.
- On the left-hand side of the new window that opens, under the Connections menu, locate and expand your computer’s designation by clicking the small arrow next to it.
- In the revealed menu, right-click on Sites and select Add FTP Site.
- You will be prompted to give your new FTP site a name, and to choose a physical file path for files to move through. You can choose an existing folder, or make a new one using the ellipsis button next to the text box. Click Next once finished.
- In the window that follows, leave all the settings as their defaults except for SSL, which you can change to No SSL. However, if you are planning on using your FTP server for sensitive data, you should set up SSL for added security. Click the Next button.
- Under Authentication, select Basic, then select Specified Users under Authorization and enter either your username for your computer, or the email address associated with your Windows 10 account. Finally, check off both Read and Write, and click Finish.

How to Allow Access to Your FTP Server
With just a few simple steps, you can now get quick and easy access to your FTP server with the folder of your choice! But if you’re using Windows Firewall, be sure to grant permission for it to connect through. It couldn’t be simpler – here’s how it works.
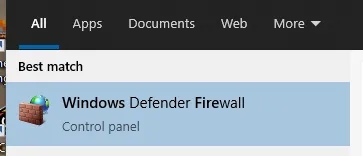
- Press the Windows Key on your keyboard and type “Windows Firewall” into the search field. Locate and select Windows Defender Firewall.
- Open Windows Defender Firewall
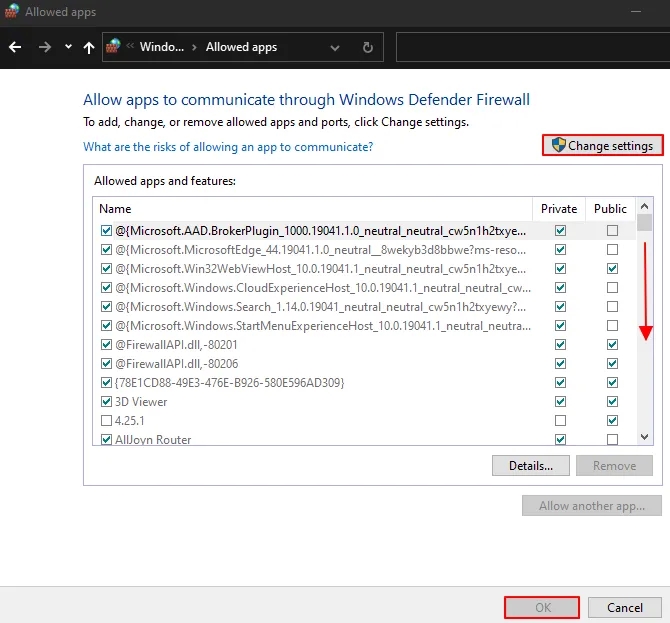
- In the window that follows, select “Allow an App or Feature Through Windows Defender Firewall” on the left-hand side.
- On the right, click the Change Settings button, then locate FTP Server in the list beneath.
- Put a check in the box beside it, as well as in the boxes in both the Private and Public columns.
- Finally, click OK to save your settings.
You’re now all set up to access your FTP server from anywhere in the house! All you need is an internet connection and a compatible client, and you’ll be able to quickly share files with anyone on your local network.
How to Connect to Your FTP Server From Outside the Local Network (LAN)
Unlock the door to your FTP Server and get it connected with a path through the internet! Port Forwarding provides an easy way of building this highway, but before you start paving roads confirm that your router is up for it. Most routers follow similar steps so check out the manufacturer support website then open wide – let’s get those data flowing!
- Press the Windows key and type “Command Prompt” into the search field. Locate and click this option.
- In the Command Prompt window type the command “ipconfig” and press the Enter key.
- This should reveal your Default Gateway IP Address. It should look something like: 192.168.X.X
- Take note of this, as well as your IPv4 address.
- Open your favorite web browser, and type the Default Gateway IP Address into your browser’s address bar. You will be greeted by your router’s management console.

Want to sign in but don’t know how? Don’t worry, you just need your router credentials! They are different than the username and password for WiFi. Depending on what type of setup you have at home, these can usually be found printed on the backside of your router or may already be set up as “admin” if they haven’t been changed yet.
- Once logged in, locate the Port Forwarding section in the management console, usually located within the WAN or NAT settings.
- Create a new Port Forwarding entry with the following information:
- Service Name: You can choose any name, such as the name of your FTP Server.
- Port Range: Use port 21, as this port is required.
- PC’s TCP/IP Address: Use the IPv4 address we located in step 3.
- Local TCP/IP Port: Again, use port 21.
- Protocol: Select “TCP”.
- Click the Save or Apply button to save your configurations
Testing your FTP server access is crucial after successfully forwarding port 21. Locally, open a browser and type in “FTP://” followed by your computer’s IP address to test the connection – it should prompt you for credentials if successful. For an internet-wide assessment of accessibility, use a search engine like Google to find out what your public IP address is; enter this with “FTP://” at the beginning into another tab on that same web browser – again entering sign in information ends up allowing file browsing and downloading from any machine connected online!
How to Manage Your FTP Server with an FTP Client
To get your files on the FTP Server, take advantage of Windows File Explorer’s built-in FTP Client. It makes it easy to upload and manage data – just follow these simple steps!
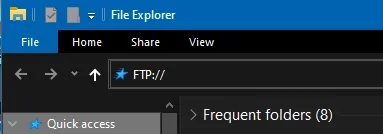
- Open Windows File Explorer. You can do this by pressing the Windows key and typing it into the search field, or by pressing the Windows and E keys together.
- In the address bar at the top, type in FTP:// followed by your public IP address, which we found to test accessing your FTP Server through the internet.
- This should prompt you to sign in. Do so using your FTP credentials and click the Save Password option for ease of access, then click the Log On button.
It’s never been easier to transfer or store data! With your FTP server, you can now access and share files almost as quickly as if they were stored on a hard drive. Plus, with the ‘Pin Current Folder To Quick Access’ option located in the left-hand pane of the window, accessing your IP address is quicker than ever – just select it from your list of items on hand. Fasten those seatbelts – this ride will be over before you know it!
Wrapping it Up
Private FTP servers are a powerful solution to the problem of file storage and sharing. From giving secure access to family, friends, or colleagues across distances to removing cumbersome limitations enforced by other services – this is an ideal option for handling sensitive data with ease. With its ability to provide unrestricted access people can effortlessly share files quickly no matter their location!